Friday, December 31, 2010

Farewell, 2010

I'm excited to see what God has in store for me in 2011. 

I'm not really sad to leave 2010 behind.  Honestly, it's been the most difficult year of my life.   Losing Papa Chuck was so hard...going through all of our "firsts" without him this year, and watching my Ami struggle bravely through it has torn at my heart.  It's changed all of us.  We cherish our time together more, but there's also a lingering sadness.  We've been reminded that nothing lasts forever. (Other than God's love, but even then, I need to be reminded sometimes!)

It's been a difficult year for me jobwise, too.  Two positions that I had hoped and prayed for didn't happen, and one was flat-out taken right out from under me.  It's been hard to trust any principal--or have any desire to work in an elementary school.  Being a substitute teacher for 2.5 years was supposed to help me find a fulltime position to move into.  But it hasn't.  It's just left me feeling empty, unimportant, and utterly and completely used.  I still yearn to be an elementary teacher--it's what I've wanted my whole life!  But I've put that on the shelf for now.  I don't know why God works things the way He does, but I'm done trying to fight for the things I want.

If there was a theme for 2010, it would be "Make Lemonade."  That's why this blog is here.  That's why I have my Etsy shop, and that's why our house has been overflowing with handmade projects.  I've learned that very little of anything is actually in my control (I've also discovered that I'm a bit of a control freak!).  I've learned to go with the flow...ish.  I'm working on it :-)  But I've also taken my sadness and desperation and feelings of inadequacy and put that energy into making things.  I had a wonderful experience at my first boutique in November, I've loved being involved in various blogging communities, and I've loved creating things for others. 

What do I hope for 2011?  Peace.  I want the theme of this new year to be Fulfillment in Christ.  This past year, I learned how to be joyful in spite of things, but this upcoming year, I want to be joyful.  Period.  I've always know that God has full power over my life, but I spent a lot of this year begrudging of it.  I want to be at full peace with His plans for me.  Joyfully anticipating instead of sullenly accepting. 

Yeah, this year didn't turn out the way I thought it would.  Shock!  I'm not putting up any expectations for next year.  God has promised us that He has it all laid out in a perfect tapestry that we can't even imagine.  Maybe it will take getting to Heaven before it all makes sense, but I'm hoping it will come before that :-)

Sometimes I have to look back to get some real perspective.  This is a journal entry I wrote weeks before our wedding:
We're still counting down the days to April 11th, the day we find out the church at which Jesse will be placed for internship--until then, I don't know what district to request for my student teaching!  Also, Jesse's internship is only one year, after which he can either accept a call to that church (if they really need a DCE), or move on and find something else.  If I'm finished with student teaching in December and looking for a teaching position after that, I won't know if we will really be staying there or not until probably July.
I raised my concerns with Professor O'Connor.  She put her hand on my shoulder and reminded me that God will take care of things.  "He always does, and He always does a better job!" she said comfortingly.
It made me realize that I've been forgetting that sometimes lately.  I've always been so trusting and have found it so easy to give everything to God.  Maybe right now I'm having a harder time with that because these are the biggest unknowns I've ever faced: where are we going to be placed?  where are we going to live?  how are we going to afford to live?  what happens after student teaching?  where will we be after Jesse's internship?
A pretty big step from "where am I going to college?" !!!
But then on my walk back from class, I realized something: 
I may be facing the biggest "unknowns" of my life, but I'm also confident of some really big "knowns" as well: 


  1. I have God on my side, and He's going to make everything happen exactly the way He wants it to, and

  2. I'm marrying the love of my life in less than three months!  Whether we live in a Mansion, Apartment, Shack, or House (MASH, anyone?) we're going to be happy!  I love him so much, and loving him for the rest of my life is ALL I want for the rest of my life...so with him and with God, I'm set.


It's going to be a wonderful life! 

And it IS a wonderful life!  I'm so thankful for all of the things that God has provided for us.  We are so blessed.  And in my selfish nature, I lose sight of that somehow.  I want 2011 to be a year of living out God's promises, trusting in Him to provide, and being joyful through everything.

For I know the plans I have for you,” declares the LORD, “plans to prosper you and not to harm you, plans to give you hope and a future. 


Jeremiah 29:11

Thursday, December 30, 2010

Bonnie's CSN Giveaway at The Pretty Bitty Blog

Hello friends!

I just wanted to let you know about a giveaway happening on Bonnie's blog over at The Pretty Bitty Blog.

Bonnie (I've mentioned her before here) is a sweet and crafty young wife and mother who blogs about recipes, cute things she's made for her adorable little Elora, and the daily life of being a Christian who is in love with her Savior, her husband, and her little girl!

Hope on over to The Pretty Bitty Blog not only for this great giveaway, but also for a chance to meet this shining, creative girl!

Bonnie has the opportunity to give away a $25 gift certificate to CSN Stores, which is a portal to over 200 stores.  Click around and see what you can find!  I found a really pretty lacey tablecloth that I love.  Here's hoping! :-)

Click here to enter in Bonnie's very first giveaway!  (and say hi to her while you're there!)

Saturday, December 25, 2010

Merry Christmas!


 Silent night, holy night
All is calm, all is bright
Round yon Virgin Mother and Child
Holy Infant so tender and mild
Sleep in heavenly peace


 Silent night, holy night!
Shepherds quake at the sight
Glories stream from heaven afar
Heavenly hosts sing Alleluia!
Christ, the Saviour is born

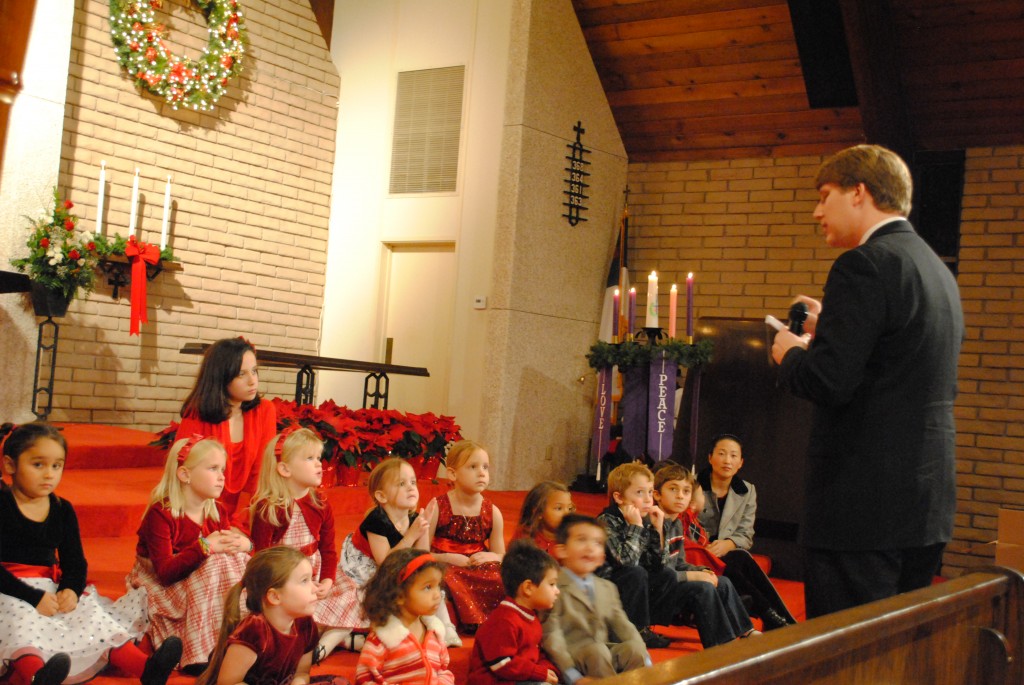
Handsome Man leading the Children's Message


 Silent night, holy night
Son of God, love's pure light
Radiant beams from Thy holy face
With the dawn of redeeming grace
Jesus, Lord, at Thy birth


 We pray God's greatest blessings on you this Christmas, and in the upcoming New Year!

♥ Bethany and Jesse

Wednesday, December 22, 2010

Guest Post Recipe: Julie's Gourmet S'mores

It's the last day of my Christmas Recipe Series!  Thanks for joining in Merry [home] Baking!  I hope that you enjoyed it and got lots of ideas from these wonderful, incredibly talented ladies! 

I'm so excited that Julie of The Little Red Shop agreed to do a guest post for me.  I found her blog a few weeks ago, and it was love at first sight!  Aside from being an irresistably creative crafter and shop owner, I knew as soon as I saw her Christmas music playlist that she was a woman after my own heart.  (I'm not even kidding.  Check it out and you'll see what I mean!  I couldn't have made a better compilation of my Christmas favorites if I'd done it myself!)
Julie's blog is endearing.  She combines her love for all things vintage with stories about her family, her shop, and lovely little things she works on.  For a California girl, it's as close to knocking the snow off my boots and sitting down for a cup of cocoa in a cozy kitchen as I'll probably get.  Julie makes her blog just as cozy and inviting as her home and shop look from the pictures.  I love it!
I've truly enjoyed corresponding with Julie as we talked about her guest post.  She is so sweet and enthusiastic, it's infectious!  I hope that you will all go over and visit her blog, The Little Red Shop, and be inspired!  Be sure to say hello!   


When Bethany was so sweet to ask me to do a little Christmas baking guest post for her blog, I had to stop and think of something fun & easy to do.  You see, during the holidays, I spend more time in my li'l shop than in the kitchen...


...stirrin' up things like this!


I threw this together with bits and pieces from my kitchen shortly before discovering that my computer had eaten most of my prep shots for this project.  But I'm getting ahead of myself.

And then it came to me.

I'd make a couple of treats that I created a few years ago...


{Red band platter ~ Vintage, Cup/saucer ~ Wedgwood "Patrician"}

In The Little Red Shop, I carry vintage goodies and pretty new things for home & baby, and seasonal gourmet treats.  I used to carry something my wee friend Emily likes to call...

"Goodness of Happiness!"
aka
White Chocolate-Dipped Marshmallows


But guess what!

The company does not sell them anymore.

So, when Bethany asked me to share a recipe for a Christmas treat, I thought it was about time to dip the marshmallows...myself, and let you in on the secrets behind my...

Goodness of Happiness S'mores & Fun Milk!

Fun milk came to be one Christmas Eve, when my sister-in-law wanted her li'l kiddos to have milk with dinner.  All I had was the non-fat version, so I poured a couple of short cool ironstone mugs full of milk and topped 'em off with swirly mounds of whipping cream!  "Fun Milk" was born!

Now, onto the s'mores...

For my first batch, I mix several broken squares of Godiva Chocolatier White Chocolate Vanilla Bean bar with a small handful of Ghirardelli Chocolate Premium "White Classic" Baking Chips in a vintage milk glass pyrex gravy boat.

I absolutely love using milk glass for baking prep!

I then...

(STIRRING AT 20 SECOND INTERVALS)
Microwaved on "melt" for approximately one minute.

Carefully removed the dish from the microwave and stirred the white chocolate until all of the pieces melted.

Then using a wooden skewer, I stabbed one Kraft "Jet Puffed" Marshmallow at a time and dipped/rolled it into the melted chocolate.  I used the edge of another skewer to smooth the sides & to remove the excess chocolate. 

(Isn't "excess chocolate" an oxi-moron?) 

Just keep dipping marshmallows whilst the chocolate lasts!  The nice thing about making them like this...is you can do itty bitty bits at a time and not be overwhelmed by a huge bowl o' chocolate which does not want to stay melted.

I placed each fresh Goodness of Happiness Marshmallow on a piece of wax paper...on that li'l vintage platter to cool.

Too cool...and much easier than I thought it would be!

Cooling ~ {it doesn't take long in my chilly kitchen} I popped them in the fridge for 15 minutes or so to speed up the chocolate setting.
This is not my fridge.


On a microwave-safe dish, I placed:

 One Pepparkakor (Swedish Ginger Thin Cookie available at The Little Red Shop, or Ikea)

One Homemade Goodness of Happiness Marshmallow

&

Microwaved on "High" for just a few seconds
(or until the marshmallow expands enough to cover the cookie)

Carefully remove from microwave, place on a pretty plate, and top with another pepparkakor!


Mmmmm....
I have a confession to make.

I didn't just settle for

WHITE CHOCOLATE GOODNESS OF HAPPINESS S'MORES
&
FUN MILK


I made peppermint fun milk & chocolate chocolate-dipped marshmallows too!
(I used nonfat milk with peppermint whipping cream (Land O'Lakes) and Toll House Semi-Sweet Chocolate Chips instead of white chocolate)


What's better than Deep Dark Chocolate Goodness of Happiness?


Gooey Deep Dark Chocolate Goodness of Happiness S'mores dipped in frothy Peppermint Fun Milk!!!

Please, try this at home!


Goodness of Happiness S'mores Fixings make a lovely gift!
Thank you so much, Bethany, for letting me visit with your friends!

Please feel free to stop by my blog, The Little Red Shop and say, "Hello!"

Merry Christmas!
May God Bless you and your loved ones throughout the New Year!

: )

Julie M.

ps The main model marshmallow in this post was from my second batch, for which I used ONLY the Ghirardelli Classic White Chocolate Baking Chips.  The Godiva Vanilla Bean chocolate has a smokier flavor and will give you a more speckled looking treat.

One Year

It's been a year today since Papa Chuck died. I still marvel at all of the events of last year. What a whirlwind his last month on earth was! I went through every emotion during that time. I think we all did.

Fearing losing him, preparing to say goodbye, cherishing our last days together as the whole family we've always known, and praising God for His incredible mercy in bringing my papa--the most stubborn unbeliever I had ever met--finally Home to Him.

I still miss him terribly, but mostly what I feel is still thankfulness.  Utter thankfulness that God didn't let 22 years of my prayers go unanswered.  Papa Chuck was the most prayed-for person I know.  All of my family, many of my friends, the whole church family back home, prayed continually that he would listen to the Good News that was all around him and believe in Jesus Christ his Savior. 

Thankfulness. 

And awe.

Utter awe that God opened a disbelieving heart two days before he called that heart home to Him.  The last time Papa was fully conscious, he was reading the words my dad had written as a witnessing message to him.  He nodded his head that he believed, and then drifted off to a sleep he never woke up from. 

It's such a comfort to know that my Papa Chuck is in heaven--the one person in my family who refused to believe nearly his entire life is the one who entered Heaven's Gates before the rest of us!  Praise God!

I love thinking about how Papa must have felt.  I've been raised my whole life with stories about God's love for us--but still, seeing Jesus in Heaven will be an incredible moment that I can't imagine.  Think about the excitement Papa must have felt, though.  To go from knowing nothing about the God who created him to being welcomed into the loving arms of his Savior.  All in two days.  Thank you, Jesus!

I can only imagine.

Guest Post Recipe: Stacey's Swedish Brownies

I hope you're having a wonderful week of preparation for Christmas!  I'm realizing once again that I was overly ambitious...I need to start preparing for Christmas in July!!!

I'm excited to share this recipe with you.  My friend Stacey, from Just A Girl and Her Macbook, makes this delicious dish for many special occassions, and we always look forward to it!  Stacey is a wonderful friend from church, and I'm blessed to have her in my life!  I hope that you will head over to her blog to see more of her recent recipes, adventures with her husband, and enjoy her fun, sweet and spunky spirit!

Hi everyone! When Bethany asked me to share this recipe, I was all for it - it's one of my favorite family recipes, and it's super easy. This recipe comes from my mom, who calls them Swedish Brownies... I have no idea if it's actually a Swedish recipe, but my mom's Swedish so we'll say it's authentic. :) They look like a lemon bar, have the consistency of light cake, and taste like almond/vanilla goodness. I'll list the recipe first, and then take you through it step by step. If you're an experienced baker, this is a great recipe to play around with, and if you're new to baking, then this is an extremely simple recipe to follow.


Swedish Brownies
2 eggs
1 cup sugar
1/2 cup melted butter or margarine
1 cup flour
1 TB almond flavoring or vanilla

Bake at 335 degrees for 30 minutes in a greased 8 x 8 pan.

Ok, so step by step. I took some fun pictures for you all. :)

First, add the two eggs, sugar, and melted butter to a mixing bowl. 

Stir well, until fully combined.

Then, add flour and flavoring/vanilla to sugar mixture.


Stir well, until all flour is incorporated.

It'll look like cake batter. Pour into a greased 8 x 8 pan.


(Tip: You can double this recipe and use a 9 x 13.)

Stick it in the oven at 335 degrees for about 30 minutes, or until a fork/toothpick inserted in the middle comes out clean.


This is what it'll look like when done... see the fork holes from testing? No worries, frosting will cover that up!


Once the brownies have cooled for about 30 minutes, make a batch of powdered sugar frosting. For this size pan, I used about 1/2 cup of powdered sugar and 4 teaspoons of milk, and pour on top.


Sometimes, I don't like the way my dribbles look, so I spread out the frosting with a fork or spoon once I've poured it on.


And that's it! Seriously, they're so simple that I can have a batch in the oven in about 15 minutes. If you want to experiment, you can add other flavorings, different frosting, add stuff to the batter (chocolate chips, maybe?), whatever you want. It's an extremely forgiving recipe, they last in a sealed container for a week or so, and they taste pretty good too.

If you try them, let me know on my blog! Thanks for reading, and I'm wishing you all a very Merry Christmas!

-Stacey

Tuesday, December 21, 2010

Julie's Gourmet S'mores

During the holidays, I spend more time in my li'l shop than in the kitchen...


...stirrin' up things like this!

I threw this together with bits and pieces from my kitchen.


So when Bethany of Happy Homemaker Me was so sweet to ask me to do a little Christmas baking guest post for her blog, I had to stop and think of something fun & easy to do.

And then it came to me.

I'd make a couple of treats that I created a few years ago...

{Red band platter ~ Vintage, Cup/saucer ~ Wedgwood "Patrician"}

In The Little Red Shop, I carry vintage goodies and pretty new things for home & baby, and seasonal gourmet treats. I used to carry something my wee friend Emily likes to call...

"Goodness of Happiness!"

aka

White Chocolate-Dipped Marshmallows

But guess what!

The company does not sell them anymore.


So, I thought it was about time to dip the marshmallows...myself, and let you in on the secrets behind my...

Goodness of Happiness S'mores & Fun Milk!


Fun milk came to be one Christmas Eve, when my sister-in-law wanted her li'l kiddos to have milk with dinner. All I had was the non-fat version, so I poured a couple of short cool ironstone mugs full of milk and topped 'em off with swirly mounds of whipping cream! "Fun Milk" was born!


Now, onto the s'mores...


For my first batch, I mix several broken squares of White Chocolate Vanilla Bean bar with a small handful of Premium "White Classic" Chocolate Baking Chips in a vintage milk glass pyrex gravy boat.

I absolutely love using milk glass for baking prep!

I then...

(STIRRING AT 20 SECOND INTERVALS)

Microwaved on "melt" for approximately one minute.

Carefully removed the dish from the microwave and stirred the white chocolate until all of the pieces melted.

Then using a wooden skewer, I stabbed one marshmallow at a time and dipped/rolled it into the melted chocolate. I used the edge of another skewer to smooth the sides & to remove the excess chocolate.


(Isn't "excess chocolate" an oxi-moron?)


Just keep dipping marshmallows whilst the chocolate lasts! The nice thing about making them like this...is you can do itty bitty bits at a time and not be overwhelmed by a huge bowl o' chocolate which does not want to stay melted.

I placed each fresh Goodness of Happiness Marshmallow on a piece of wax paper...on that li'l vintage platter to cool.

Too cool...and much easier than I thought it would be!

Cooling ~ {it doesn't take long in my chilly kitchen} I popped them in the fridge for 15 minutes or so to speed up the chocolate setting.

This is not my fridge.

On a microwave-safe dish, I placed:

One Pepparkakor (Swedish Ginger Thin Cookie)

One Homemade Goodness of Happiness Marshmallow

&

Microwaved on "High" for just a few seconds

(or until the marshmallow expands enough to cover the cookie)

Carefully remove from microwave, place on a pretty plate, and top with another pepparkakor!

Mmmm....

I have a confession to make.

I didn't just settle for

WHITE CHOCOLATE GOODNESS OF HAPPINESS S'MORES

&

FUN MILK

I made peppermint fun milk & chocolate chocolate-dipped marshmallows too!

(I used nonfat milk with peppermint whipping cream and semi-sweet chocolate chips instead of white chocolate)

What's better than Deep Dark Chocolate Goodness of Happiness?

Gooey Deep Dark Chocolate Goodness of Happiness S'mores dipped in frothy Peppermint Fun Milk!!!

Please, try this at home!

Goodness of Happiness S'mores Fixings make a lovely gift!

Thank you so much for inspiring me to share, Bethany!


May God Bless you and your loved ones throughout the New Year!


: )

Julie M.

ps The main model marshmallow in this post was from my second batch, for which I used ONLY the classic white chocolate baking chips. The vanilla bean chocolate has a smokier flavor and will give you a more speckled looking treat.

Guest Post: Paris' Vanishing Vegan Oatmeal Blueberry Craisin Cookies

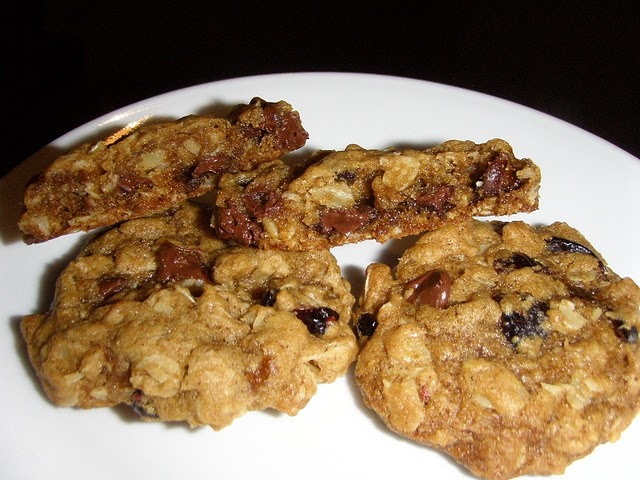
I asked my friend Paris to share her recipe for Vanishing Vegan Oatmeal Blueberry Craisin Cookies with us this week.  Doesn't it sound amazing?  I had never heard of  blueberry juice infused dried cranberries before...but leave it to Paris to find something unique and delicious--as well as healthy--like this.

Paris and I have been friends since 6th grade, and through the years, Facebook and our blogs have kept us in touch with each other.  She was actually my inspiration to begin a blog in the first place!  I love reading about her sweet little family, and getting new ideas for healthful living.  Don't miss the opportunity to visit Paris at Bless My Nest and say hello!

Hello everyone! My name is Paris and I'm the author of Bless My Nest, where I blog my favorite recipes, all tried and true. I have been happily married to my husband David for almost 6 years, and I'm a stay at home Mama to our son James who will be 3 in May! I spend my days coming up with fun ways to entertain our little guy, meal planning, doing laundry, making nourishing meals for our family and keeping our home relatively clean as well. It's a sometimes challenging, but altogether wonderful life! I'm so glad Bethany asked me to participate in her Happy Home Baking series and can't wait to share this yummy recipe with you! Enjoy, and Merry Christmas to you and yours!!


My husband and I came up with this recipe on a whim, as an adaptation to the traditional oatmeal raisin cookie. The combination of oats, sugar, blueberry, cranberry and dark chocolate is incredible.

The recipe is Vegan, and it was actually our first attempt at baking Vegan cookies. I love using flax as an egg replacer, and while I was nervous as to how it would work out in this recipe at first, the final results scream success! Even if you're not Vegan, try using a flax egg! Flax is wonderful for you! Learn more about how great flax is here .


Ingredients:

1/2 cup Earth Balance
1/2 cup brown sugar
1/4 cup white sugar
1 flax egg
1/2 teaspoon vanilla

3/4 cup white flour
1/2 teaspoon baking soda
1/2 teaspoon cinnamon
1/4 teaspoon salt
1 1/2 cups old fashioned oats
1/2 cup blueberry infused Craisins
1/2 cup Ghiradelli chocolate chips

Heat oven to 350
Beat together Earth Balance and sugars until creamy.
Add flax egg and vanilla and beat well.
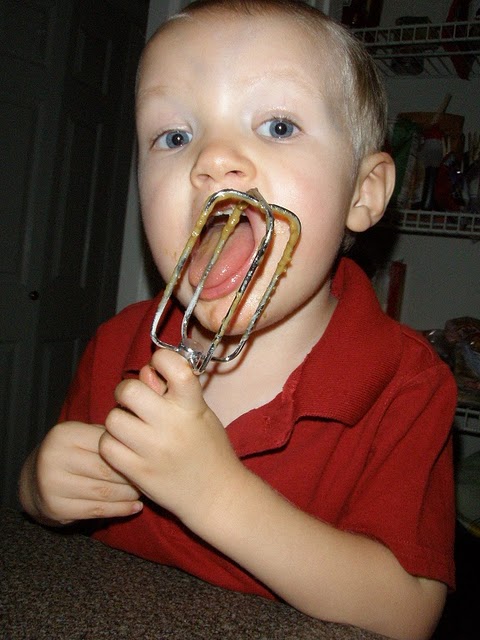
Lick the beaters. (if you're using a flax egg)
Mix flour, baking soda, cinnamon and salt until well blended. Add to the sugar mixture and mix well.
Stir in oats, Craisins and chocolate chips and mix well.
Drop by rounded tablespoonfuls onto an ungreased cookie sheet.
Bake 10-12 minutes or until golden brown.
Allow to cool slightly and enjoy!


The best thing about baking Vegan is feeling 100% carefree while your little one licks the beaters.


Sunday, December 19, 2010

Guest Post: Candace's Double Layered Pumpkin Cheesecake

The first time my friend Candace brought her double layered pumpkin cheesecake to an event, I just about melted with happiness.  I didn't think many things could be better than cheesecake--and if there was anything close, in my mind, it was a tie with pumpkin pie.  Imagine the two together.  I hear a chorus of angels in my head: "Ahhhhhhhhhhhhhhhhhhhhh!"

Pure amazingness.

I'm having difficulty uploading pictures tonight for some silly reason, so I really want to encourage you to go visit Candace's page and see her beautiful step-by-step photo instructions for this delicious cheesecake.  After looking at her pictures for this recipe, have fun poking around on her site!  Candace's blog is full of recipes, projects, and stories about her adventures as a newlywed.


And now, I'll turn it over to Candace.

Hello! My name is Candace.  For the past couple of years, I've made it my tradition to cook pumpkins, and make pumpkins pies and cheesecake from scratch.  The recipe below is super easy, and a definite favorite of many!  If you don't have fresh cooked pumpkin, then canned pumpkin works just fine too! Hope you enjoy!

16 oz. softened cream cheese
1/2 cup cooked pumpkin (Click Here for cooked pumpkin recipe)
1/2 cup sugar
1/2 tsp vanilla extract
2 eggs
1/2 tsp cinnamon
1/8 tsp cloves
1/8 tsp nutmeg
1 graham cracker crust

Blend cream cheese, vanilla and sugar together in a bowl until it reaches a thick smooth consistency.

Add eggs in and blend until smooth.

Remove 1 cup of the plain batter and spread evenly into the pie crust.

Next, add the rest of the ingredients (pumpkin and spices) to the remaining batter and blend smooth.

Spread the pumpkin batter carefully over the plain batter, and bake at 350 degrees for 40-45 minutes.

Cool, then chill in the fridge for 3 hours or more. Serve with cool whip or whipped cream, and enjoy!

Friday, December 17, 2010

Guest Post Recipe: Jamie's Cinnamon & Sugar Puffs

 Welcome to my Five Days of Christmas Recipes!  If you're anything like me, you're using these few days before Christmas looking for some new recipes to put on the table on Christmas day (or to bring to one of the many Christmas parties this week!)

From now until December 23rd, I'm excited to get to introduce you to a different blogger each day.  These are all wonderful, talented women, and I can't wait to have them share their ideas!  I hope you enjoy :-)


I found Jamie from With Love through her Etsy  shop.  Jamie makes the cutest felt gifts and beautiful beaded jewelry.  She blogs about her latest vintage findings, shares inspirational photos, and blogs about her daily life, her husband and her adorable little guy.  Please make sure that you stop by her blog and her shop and share some love!


Hi everybody!

 My name is Jamie & I blog over at With Love about my life, inspirations & other fun things. Come say hello sometime!
The very sweet Bethany asked me to do a little guest post...so here I am! I am here today to share a very yummy & fun recipe with you! These cinnamon and sugar puffs are super easy, fun to do with kids (they LOVE to eat them too!) and are perfect served warm for breakfast, or for dessert!
 

Ingredients:
1 1/2 cups flour
1 1/2 teaspoons baking powder
1/2 teaspoon salt
1/4 teaspoon ground nutmeg
1/3 cup shortening
1/2 cup sugar
1 egg
1/2 cup milk
1/2 cup sugar
1 teaspoon ground cinnamon
1/2 cup butter, melted

-Heat oven to 350 and grease 12 muffin cups with shortening or cooking spray.
-In a small bowl mix flour, baking powder, salt and nutmeg.
-In large bowl or mixer, stir shortening, 1/2 cup sugar and egg until well mixed.
-stir in flour mixture, alternately with milk.
-Divide batter evenly among muffin cups.
-Bake 20 to 25 minutes or until tops are light golden brown.

-While the puffs are baking, in a small bowl mix 1/2 cup sugar and cinnamon together. Melt your butter in another small bowl.
-Immediately roll hot puffs in melted butter, then in the cinnamon & sugar mixture.
-Serve warm! :)


Hope you have fun and enjoy!!
xoxo, Jamie

Thursday, December 16, 2010

Merry [home] Making Day 5: Pointsettia Scarf

We've made it!  It's day five!  Thank you so much to all of you who have followed me through my week of Christmas Craft tutorials! 


It's been a lot of fun...and I hope you are ready for what begins tomorrow!  Five days of Christmas recipes to bake!  I have wonderful guest bloggers lined up for each day,  and I'm so excited for you to get to meet them!  Stay tuned :-)


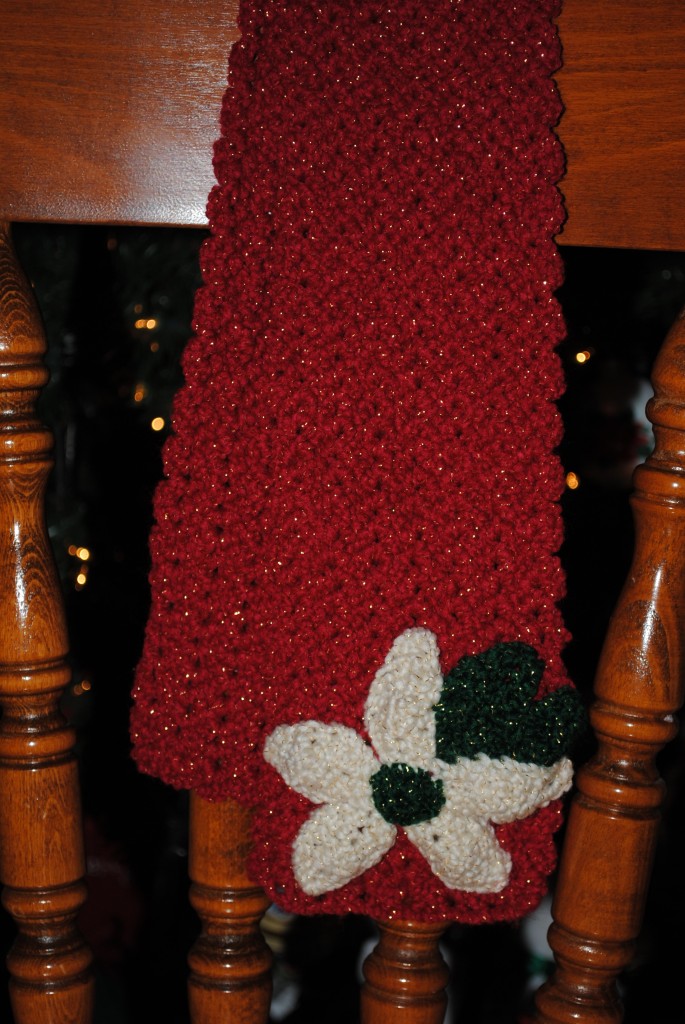
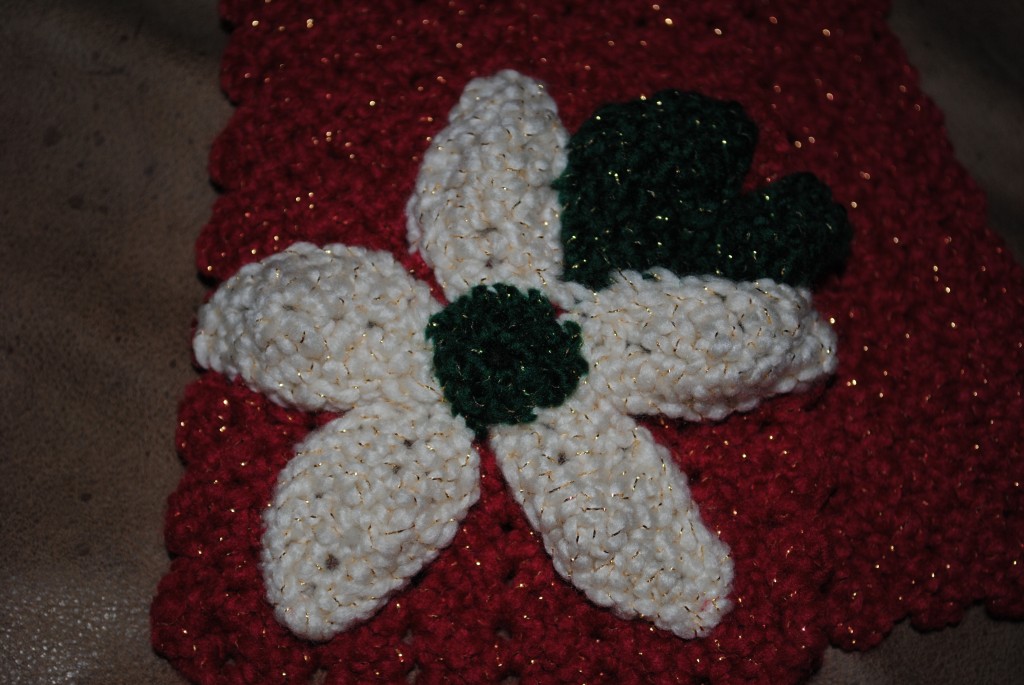
Here is the project for today:  a Bethany-designed pointsettia scarf.


It's sweet and fun, and the petals are plump enough to add just the right texture to make them pop.  Very festive!


Cast of Characters


♥ Yarn in red, green, and ivory (I used Red Heart Holiday with shimmer)


♥ Crochet hook size H


♥ Tapestry needle


♥ Safety pins


Crochet the Scarf


Someday, I would like to do an entire crochet tutorial.  As it is 1am currently, today is not the day.  I'll have  alot of fun preparing for that next year, though, and making learning how to crochet as simple as I possibly can.  Crocheting is a joy not to be missed!


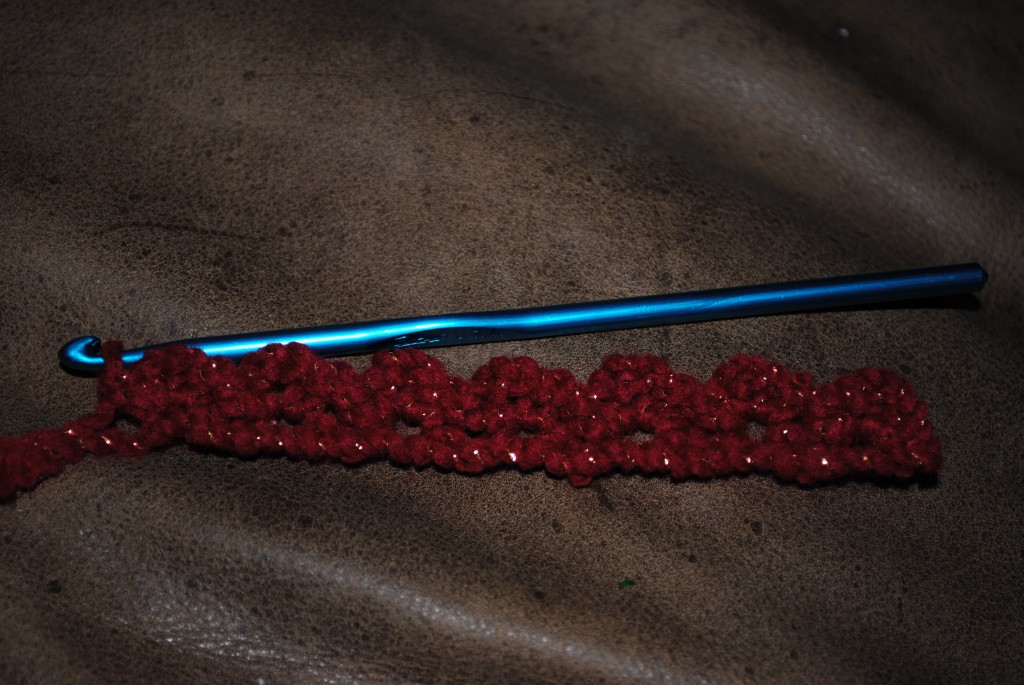
Anyway, back to our scarf.  It's made using a simple shell stitch.


Row 1: Chain 21.  Single crochet (sc) in 2nd chain from hook.  Chain 2, sc, *skip 2 chains, sc, chain 2, sc* across. 7 shells.


Row 2: Chain 1, work shell (sc, chain 2, sc, skip 2 chains) across.


Continue until your scarf has reached the desired length.  Finish off.


Make the Center of the Pointsettia


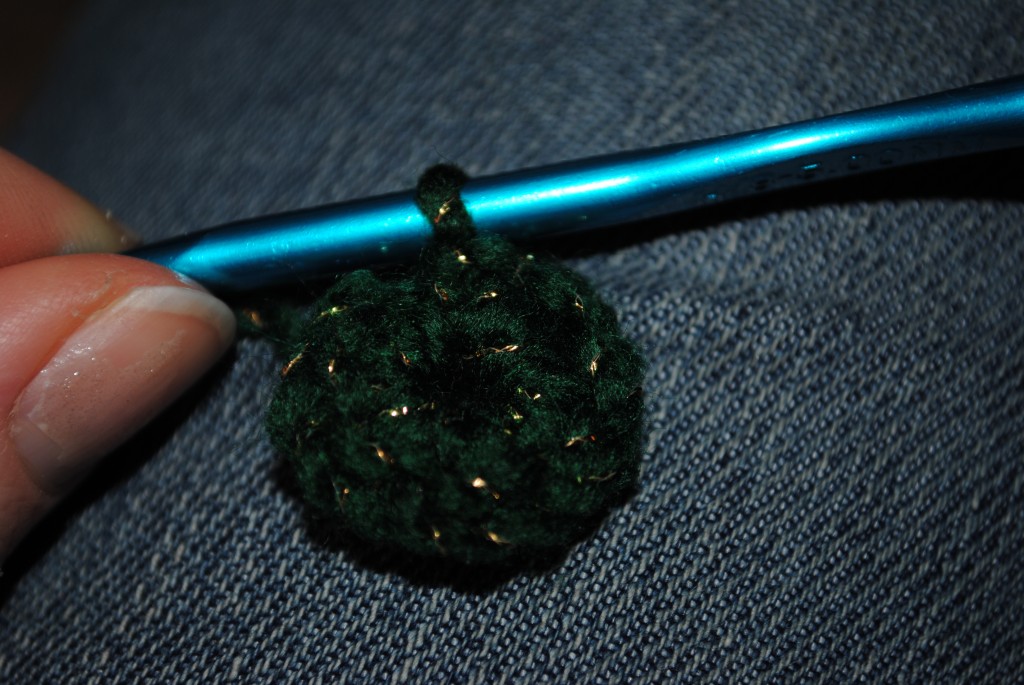
Chain 2.  In 2nd chain from hook, work in 8 single crochets.  Finish off.


Make the Leaves


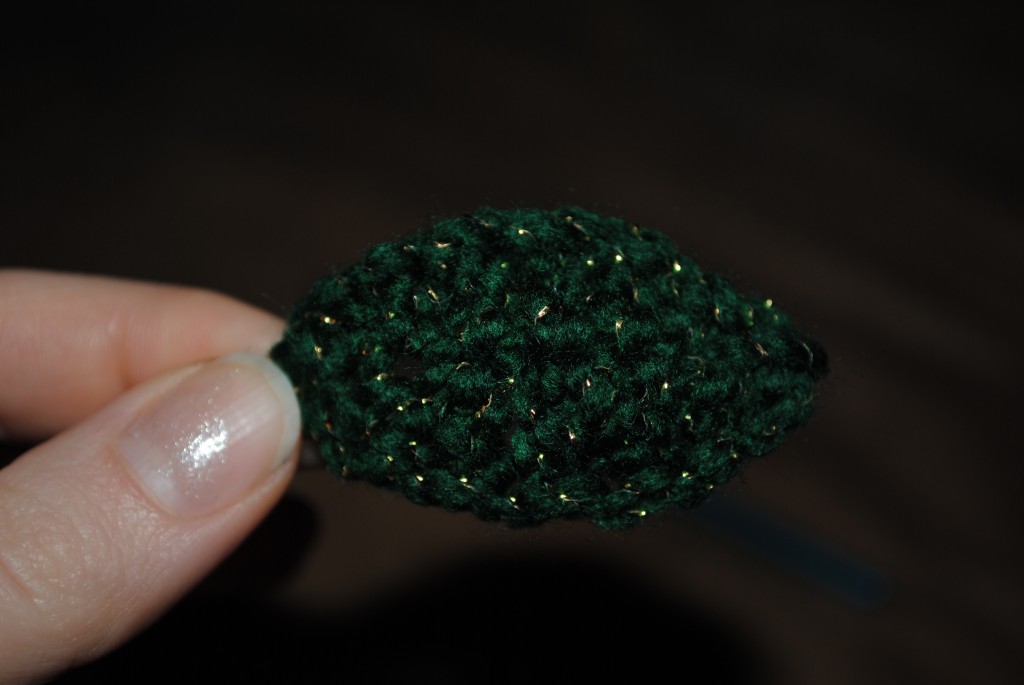
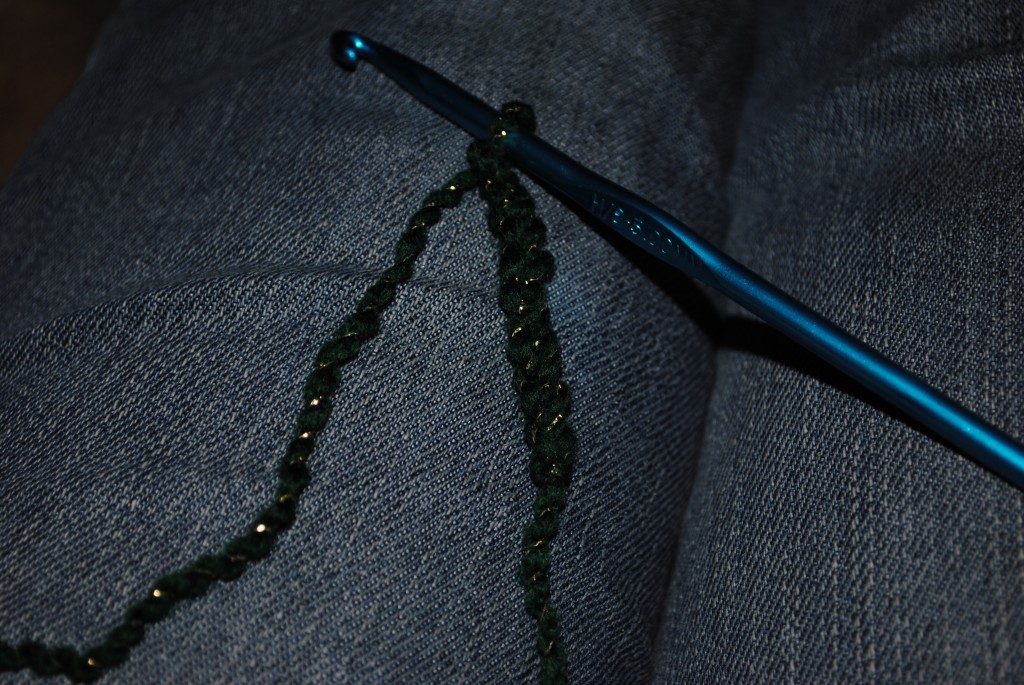
Chain 8.  Single crochet in second chain from hook.  Half double crochet, double crochet, treble crochet, double crochet, half double crochet, and single crochet across.


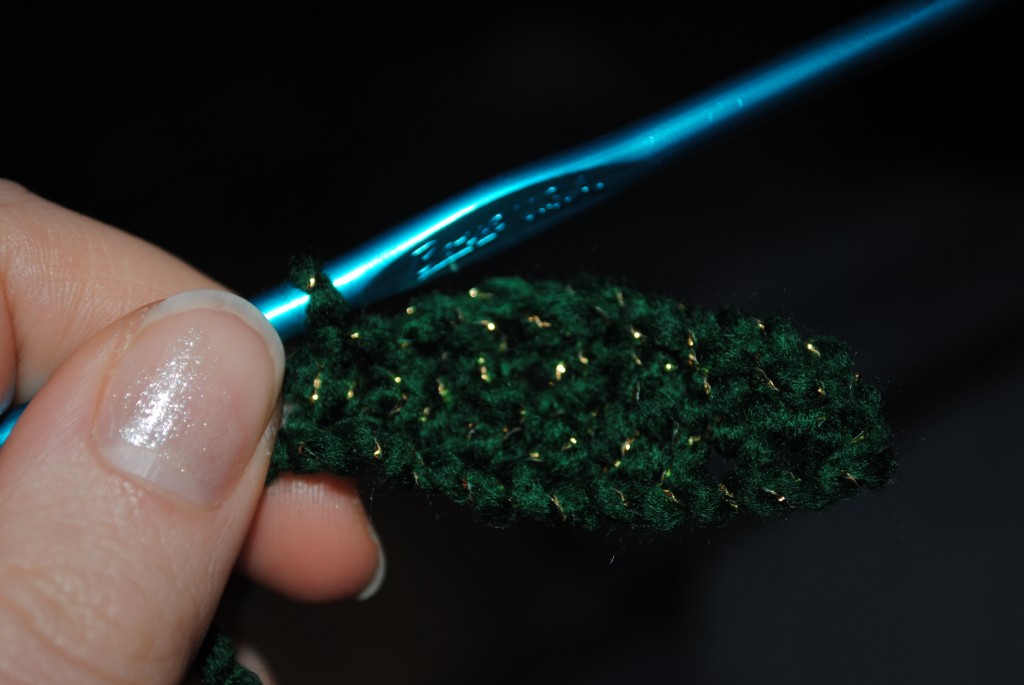
It should look like this:


Now, turn your piece over so that you can work into the opposite side of the chains.  Chain 1, then repeat pattern (Half double crochet, double crochet, treble crochet, double crochet, half double crochet, and single crochet across.)


This is what your finished leaf will look like:


Crochet 2 leaves using green, and follow the same leaf pattern to make 5 ivory petals.


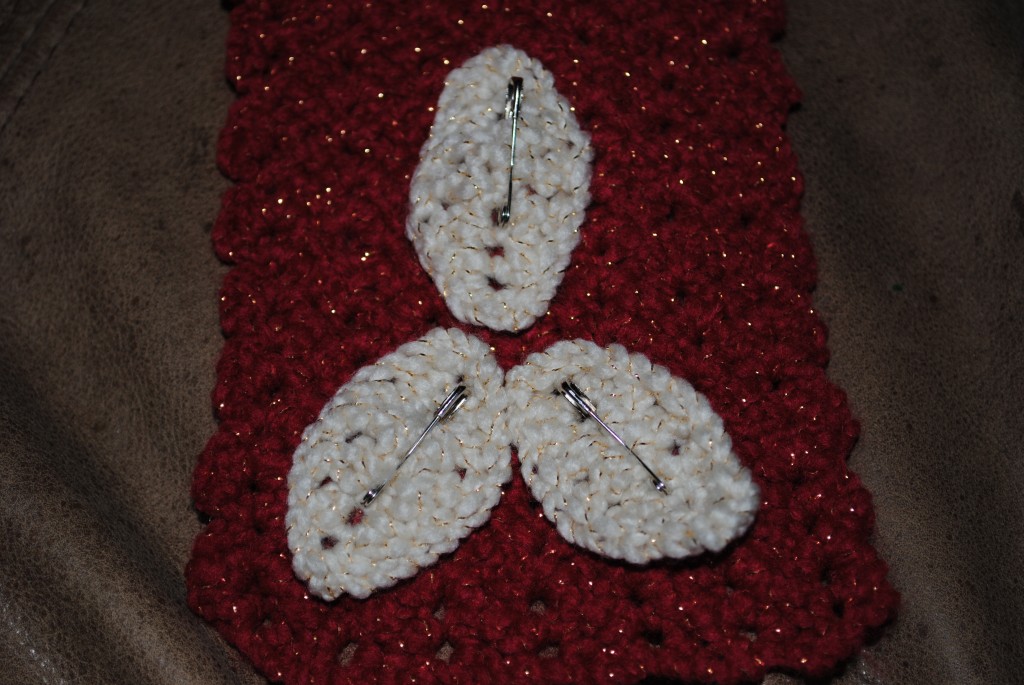
Once your petals are made pin them into place.  Use your tapestry needle and matching yarn to sew the petals and leaves gently to the scarf.


Sew all of the petals, both of the leaves, and the center of the flower on.  That's it, you're done!  Now you're all set for that Christmas party coming up :-)


Happy homemaking!

♥Bethany

Wednesday, December 15, 2010

Merry [home] Making Day 4: Tidings of Joy


I'm not one for "Happy Holidays" or "Season's Greetings."  I know what Christmas is about, and I love celebrating it!


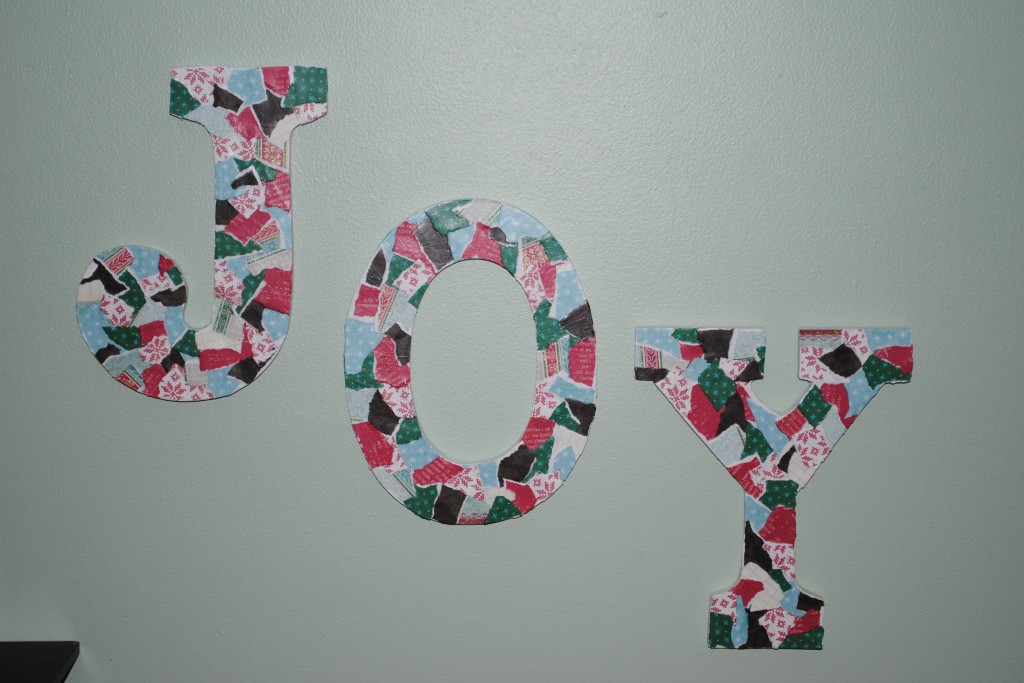
Here is a fun way to bring the "spirit of Christmas" into your home: JOY!!!


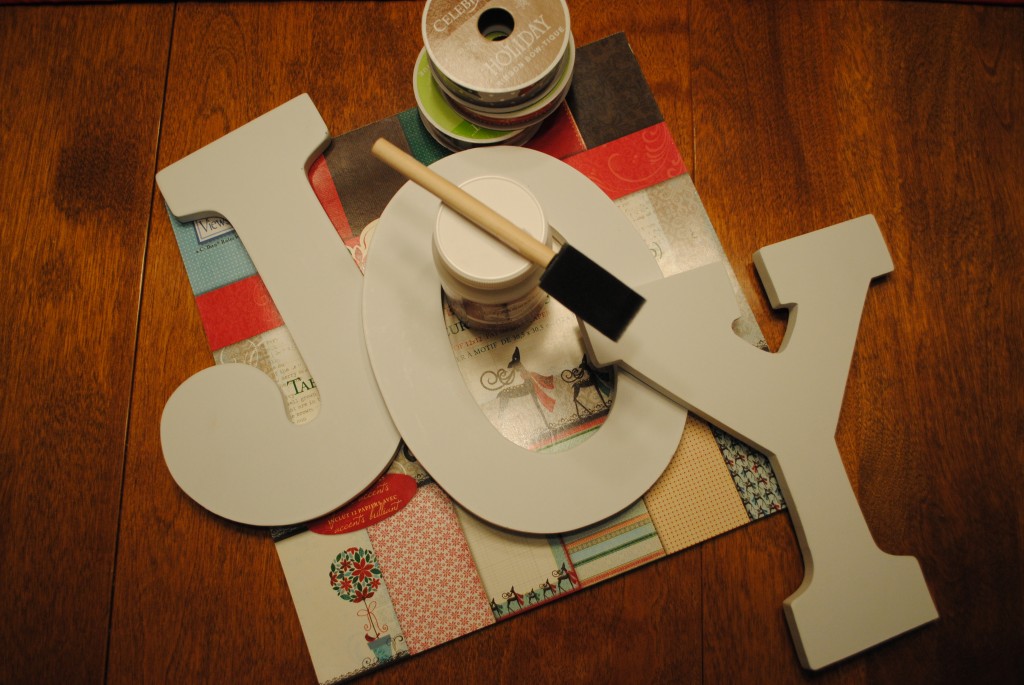
 Cast of Characters:


♥Wooden letters (four convenient sizes available at Michaels)


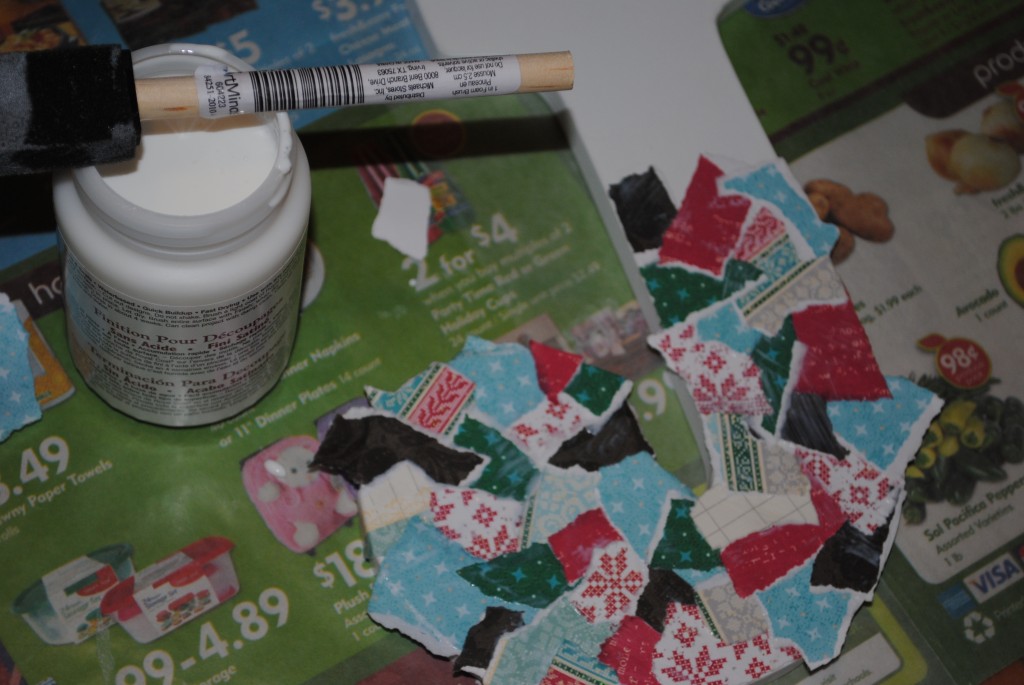
♥Decoupage glue (I love ModgePodge)


♥Spongey foam brush


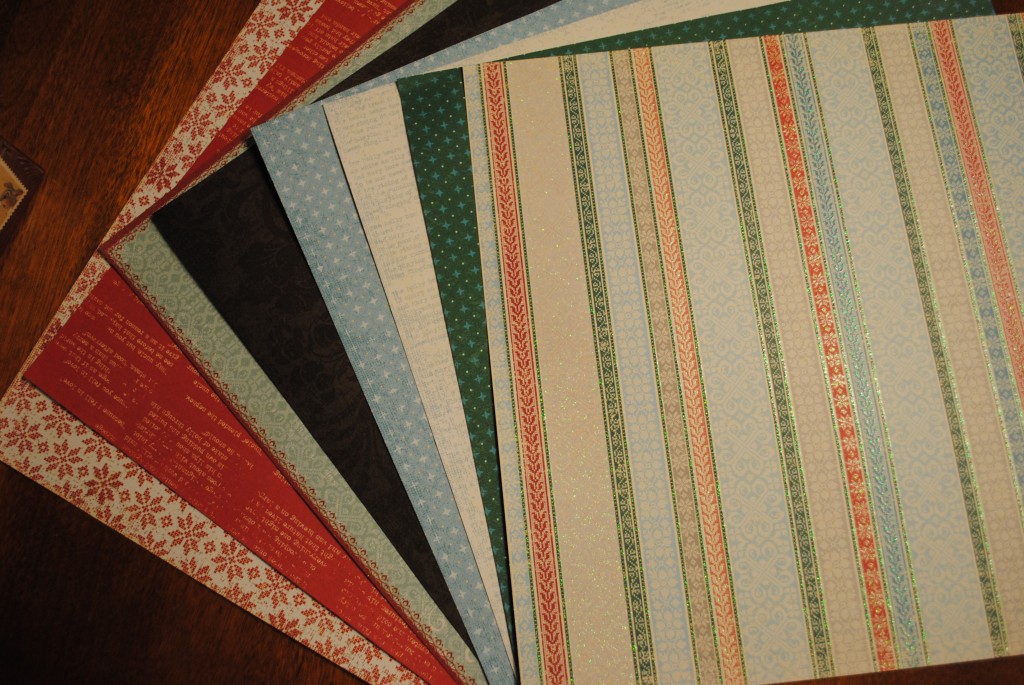
♥Colorful Christmas papers (it's easier if it's not cardstock, but mine was, so you can do it!)


♥Pretty ribbon, if you want to hang your letters that way.  It ended up not working in my space, but I think it would looks super cute!  I was envisioning something like this


♥Exacto Knife or other sharp knife


 I had a special challenge to work with, since I wanted to hang my sign in our living room, which is a soft green.  It's kind of hard to find "Christmassy" colors that work well with it!


 Tear the papers into little pieces (no bigger than an inch)


Bring out your decoupage glue and your foam brush, and get to work!
Follow the instructions on your decoupage glue.  Some of them have you work with water, some only use the glue.


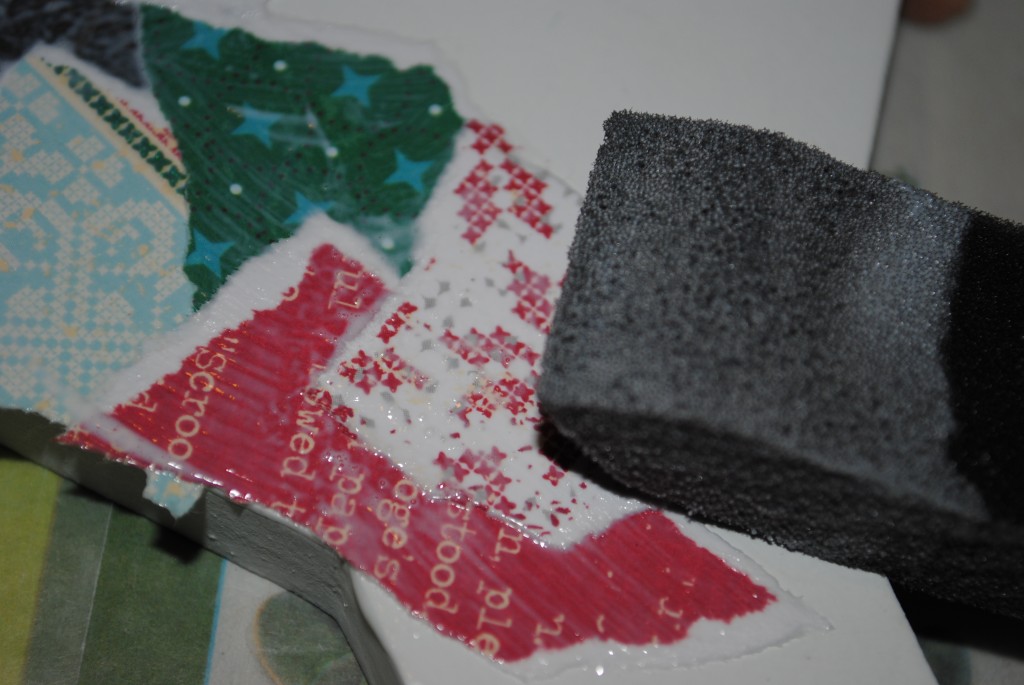
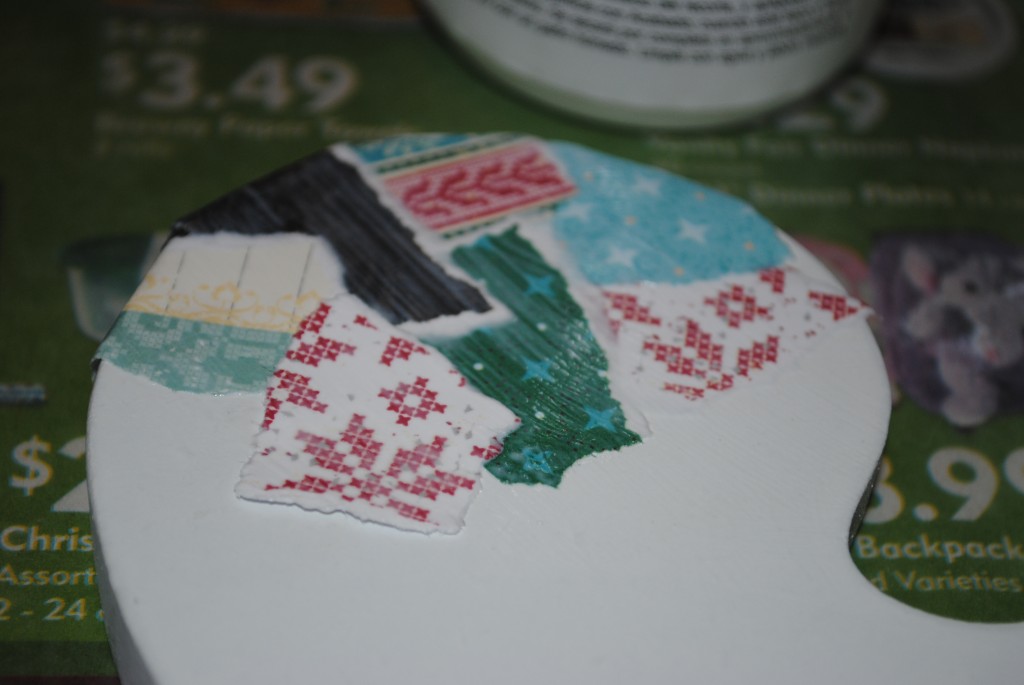
Work with one piece of paper at a time.  Coat the back of it with glue, stick it to the wood, and the brush over the top with glue, too.  Add piece by piece, covering the area.  You want to overlap them--don't glue the pieces down like a puzzle!   It's also ok to go over the edge.  You'll use a sharp knife later to cut off excess paper.


 Keep on layering and brushing, layering and brushing...


 (Notice my classy workspace?  Move over, Martha Stewart!)


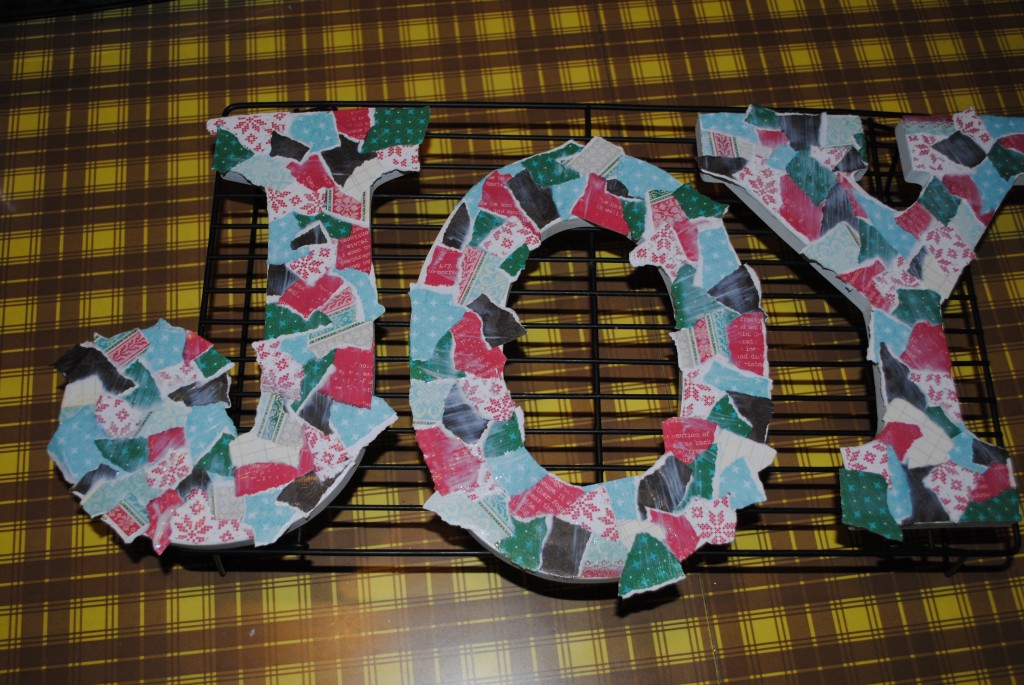
 Add two or three top coats of decoupage glue to make sure that all of the pieces of paper are glued down.  This will also give it a nicely finished effect.


Wait until your beautiful letters are completely dry, and then trim off the excess paper using a sharp knife (an Exacto knife would be ideal...but I used a kitchen knife)


Now you're ready to hang them up and enjoy!


Super fun, super quick, super easy project.


Super CUTE!


It's a simple statement in our home that will bring a smile to people's faces.


We are joyous this season as we remember Christ's birth!


 Remember, I would love to see pictures of any of the projects you work on this week!


Email me at bethany@happyhomemaker.me and make my day :-)


Happy Homemaking!
♥Bethany

Tuesday, December 14, 2010

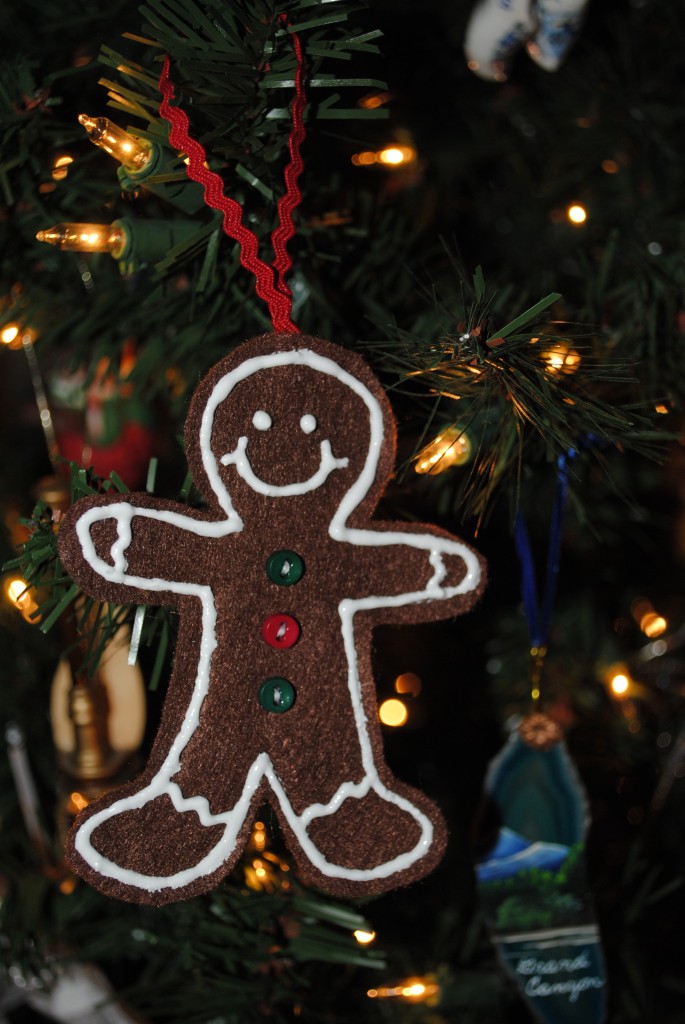
Merry [home] Making Day 3: Gingerbread Man Ornament

Welcome to Merry [home] Making Day 3!


Today is a fun and easy project that you can adapt to have your kids help you with :-) 


Who doesn't want a cute little gingerbread man hanging from their tree?


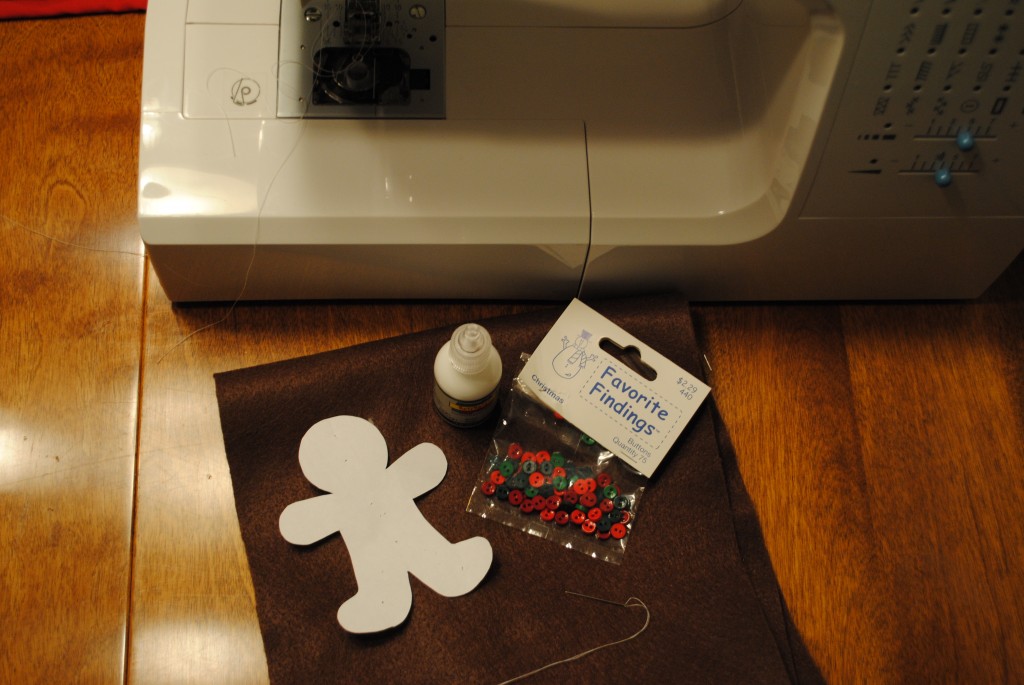
This little guy is quick and easy to make.  Here's all you need!


Cast of Characters:


♥Sewing Machine


♥Brown Felt


♥White thread


♥White fabric paint


♥Christmas-colored buttons


♥Paper gingerbread template


♥Straight pins


♥Sewing needle


♥Thin red ric-rac


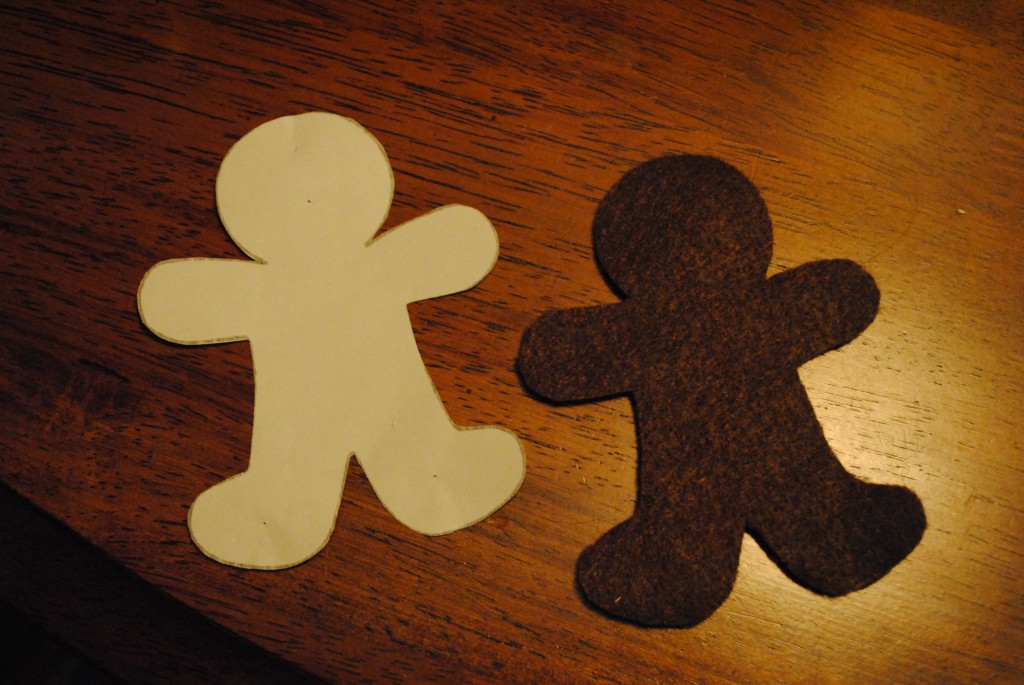
If you don't feel comfortable creating a gingerbread man template free-hand, simply look online for one that you like and print it off.


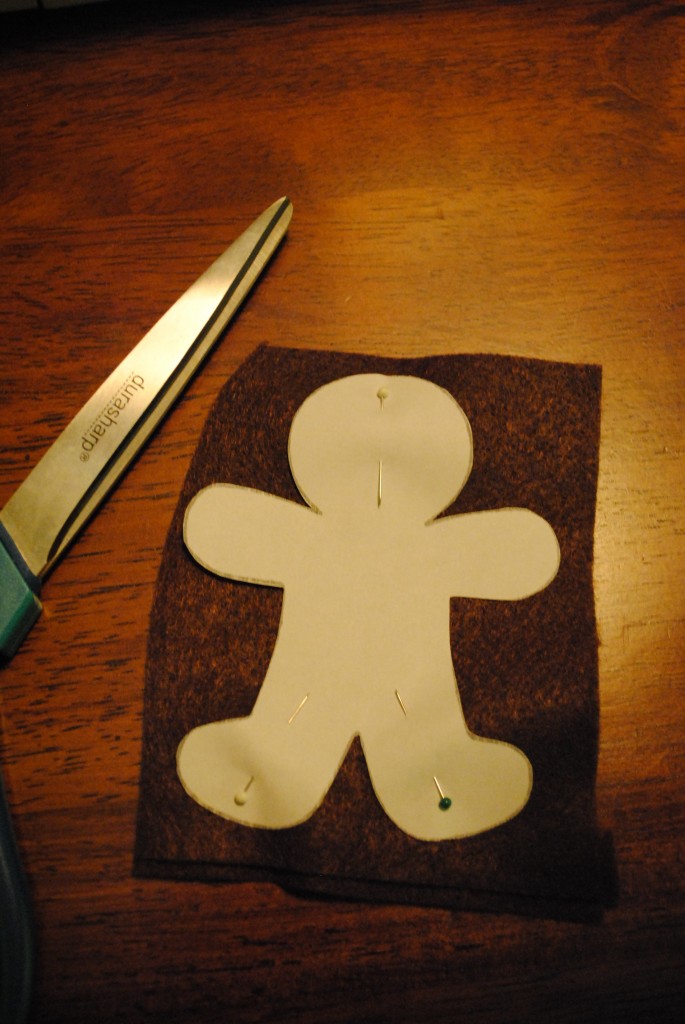
Pin your template on top of two pieces of felt, and use as a stencil to cut out your shape.


(This is me being totally lazy.  If you want to trace the template on to the felt and cut it out, go ahead :-)  )


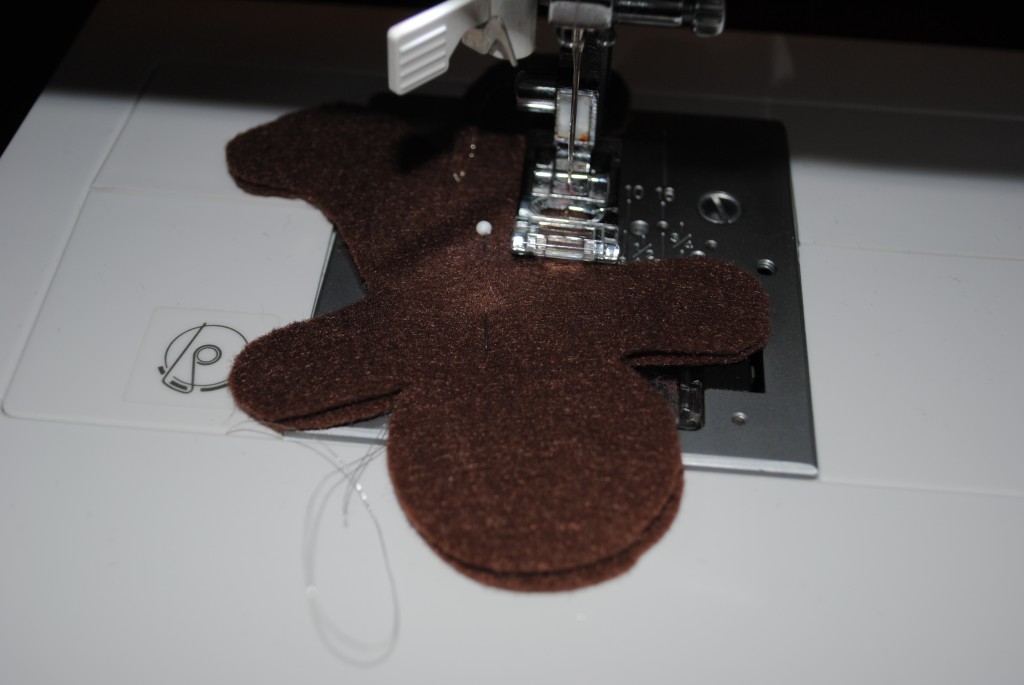
You should have two pieces of felt sandwiched together.


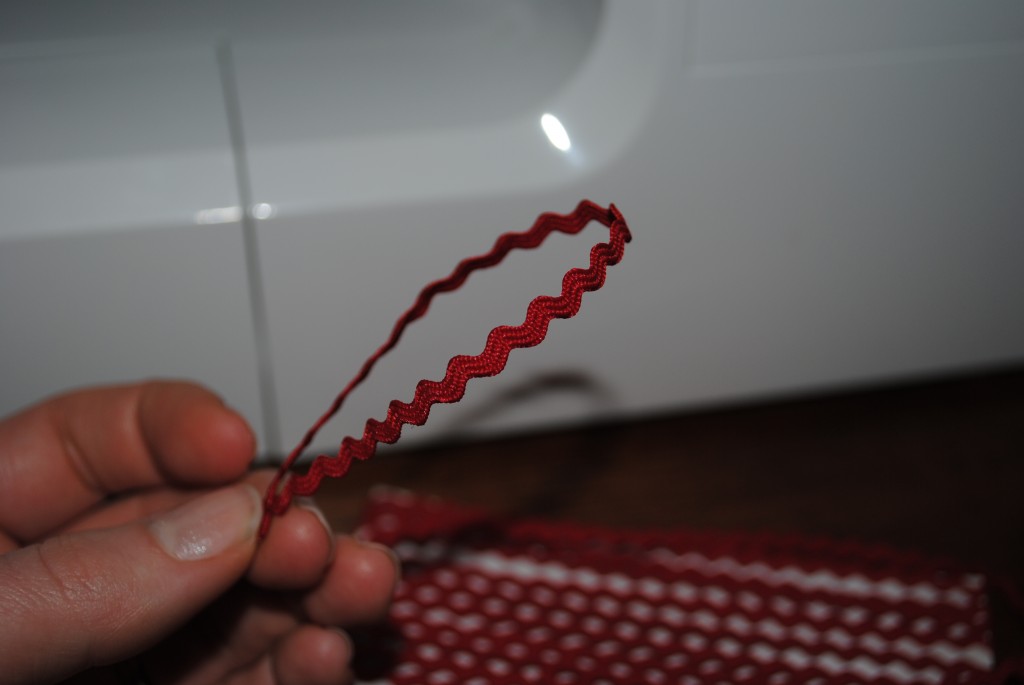
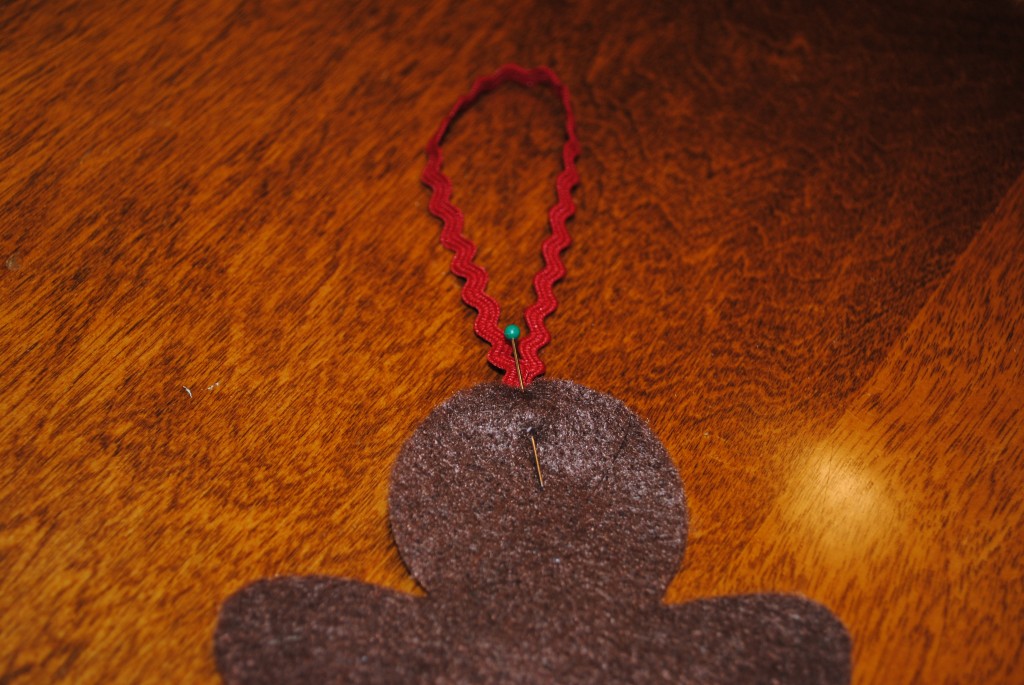
Take your red ric rac and make a loop to hang the ornament.


Pin your ric rac loop between the two felt pieces.


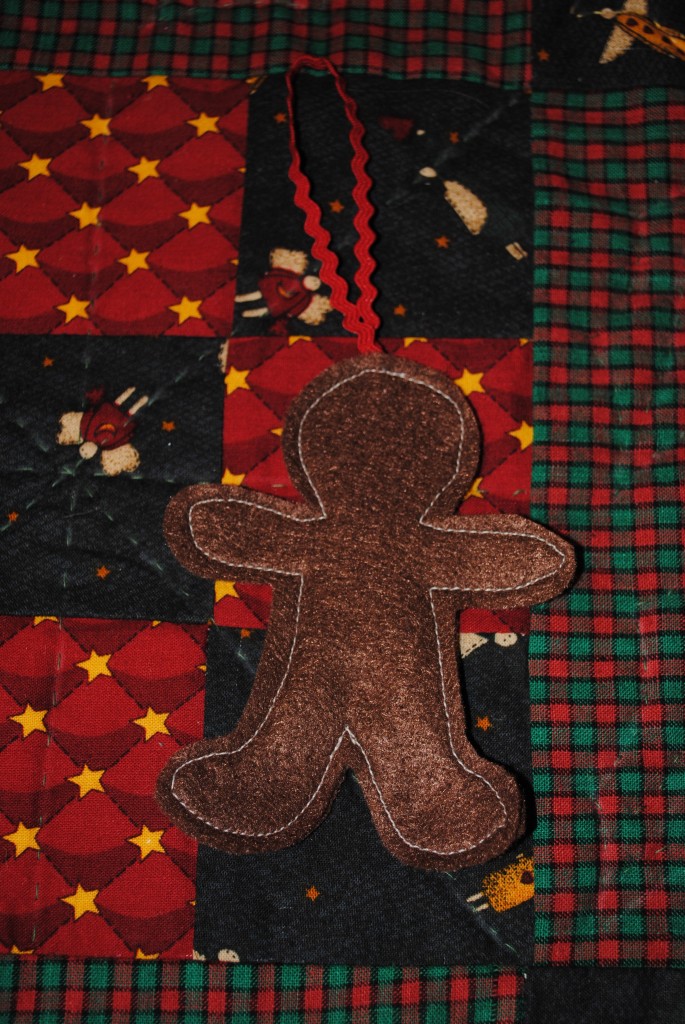
Sew your little man together!


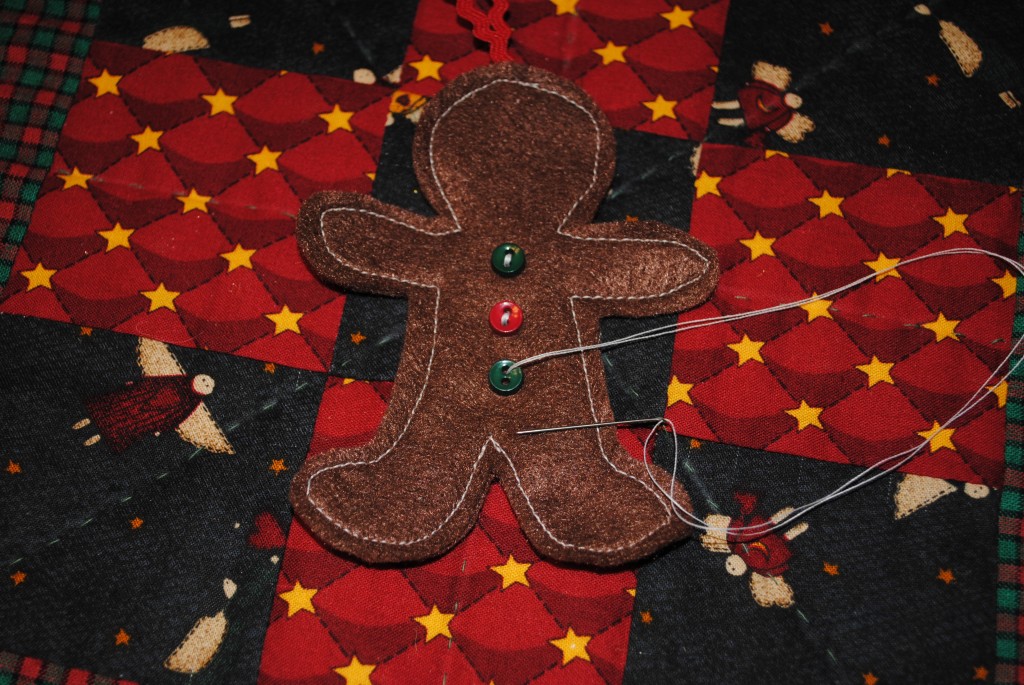
Sew some cute little buttons on his front.


Now take out your white fabric paint and trace your sewing so that it looks more like icing.  Give him a face and some clothing details, and you're all set!


Now, wasn't that easy?